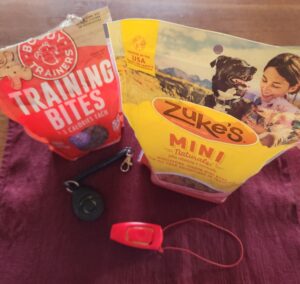
Ditch the Bowl – I highly recommend feeding without using a food bowl if and when possible. The reason for this is because we waste so many valuable opportunities for training when we essentially feed an entire meal for free. Instead of one or two meals a day served in a dog bowl (or preferrable a puzzle) measure out your dog’s ration and keep it with you in a treat pouch. Throughout the day, do mini training sessions and reward using this food a little bit at a time. Better responses get bigger rewards. Feeding this way has multiple benefits:
- You never waste a training opportunity
- Your dog learns respect for food and for you as the provider
- Excess weight from too many treats will probably not be an issue
- The bond between you and your dog will become much stronger
- Training is faster. You will teach your dog more in less time.
Markers
“Yes” or a clicker – this marker is used when your dog is expected to continue performing the cue s/he is given. For example, you ask your dog to Down. Your dog is expected to stay in a Down until released using either a release word or the termination marker in early training.
Termination Marker – “Free” or “Ok” – these markers are used when you want your dog to terminate the behavior you had asked them to continue and come to your for a reward. For example, you want to release your dog from the platform. When you say the termination marker, your dog should get off the platform and come to you for the reward.
No Reward Marker – “Nope” – This marker is used when your dog makes a mistake. It is given calmly and is NOT a correction. For example, your dog is on the platform and gets off without being released. Within one second of breaking, you give the no-reward marker and calmly use the leash to lead the dog back to the platform.
Behaviors
I recommend that you teach these behaviors in the order presented if you are having to retrain multiple behaviors as some build upon others. However, you do not need to complete a behavior from beginning to fluency before you start the next one. Teaching a dog to sit at a service dog level will require a few more steps so that a dog will perform in all sorts of places, no matter what is going on and whether you are standing, sitting, or lying down. Your dog has been through this training with me, but you are a team now and reinforcing your bond is important. From time to time, you should revisit these important behaviors so your dog and you remain a cohesive team.
Tip: when using a verbal cue, say it one time. Do not repeat yourself. The dog needs to listen or they will learn the cue is sit, sit, sit, sit.
Follow the Phase I through IV training in the Foundational Training Concepts article for each behavior listed below. I’ve included how I trained the basic behavior in for some reason you may need the information. Otherwise, a refresher starting at Phase II or Phase III would probably be where you’d be starting out. Remember: move on to the next Phase when the dog performs 9 out of 10 times correctly (90%).
Watch Me – Teaching your dog to focus on you is crucial in developing the foundation for all the skills that you will teach. The verbal cue I prefer to use is the dog’s name, but I also use ‘watch me’ as a separate verbal cue for them to look at me. We want our dogs to look at us as much as possible. If you catch your dog gazing at you, capture that behavior by clicking and rewarding it. This will encourage them to continue “checking in”. If using Watch Me or their name is not working, use a food lure. Wave the lure in front of the dog’s face to get their attention, slowly lead their gaze to your face and as soon as they look towards your face, Click! and reward them using a treat from your pouch (do not give the lure). Reach into your treat pouch and reward from your other hand.
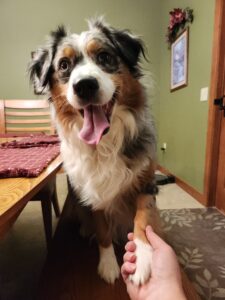
Touch – having your dog make contact with something with their nose, is a very easy behavior to teach. This is a foundation behavior for many others, such as retrieving objects, closing doors, pressing alert buttons, poking alert buttons, etc. Using the verbal marker “Yes” with your open hand will be easier for this behavior than a clicker. Present your hand, palm facing toward the dog. Refrain from moving your hand toward the dog. Treat when the dog touches your hand. Once the dog understands, increase the criteria by presenting below the dogs head, to the left, to the right, above, etc. Make the dog have more effort, switch hands, make your hand slightly out of reach. Add the cue “touch” once the automatically touches your hand with their nose.
Free – For any positional behavior, like Sit, Down, Under or Stand, it’s important to introduce the idea to the dog that there is a beginning and an end to the behavior. When you give the “down” cue, for instance, the dog needs to hold the position until you either give a new cue, like “touch” or “stand”, or until you let the dog know that they can get out of position and are free to choose what to do. This helps to ensure that your dog continues to perform the desired behavior until you’re ready for them to stop, and avoids having to regularly manage your dog’s position. Is is best to use a clicker for this one and treats. This cue can be taught the same time as you teach positional cues like Sit, Down, or Stand.
Prompting the behavior and adding the cue. Watch your dog and wait for a moment of stillness. Be patient, allow the dog to move around and wait for them to choose to stop moving, whether they stand, sit, or lie down. As soon as the dog stays still for one or two seconds, say the word “Free” while taking a step back. This will prompt the dog to move out of position. Click and treat as soon as the dog moves out of position. Repeat until you start noticing that your dog stops moving more quickly and holds still longer, and immediately moves out of position as you take a step back.
Fading the prompt and proofing the cue. Say the word “Free,” wait a second or two, then take a step back, click and treat as soon as the dog moves out of position. You are now separating the cue (the word Free) from the prompt (the movement backward). Repeat this step until the dog starts moving out of position before you move, and then gradually fade out your movement backward.
Sit – Is a great way to keep the dog calm and in a stationary position. Sit is one of the basic behaviors to teach for good impulse control. You can ask a dog to sit before receiving their meal, before going through a door, before getting out of the car, etc. Sit involves an implied Stay, as the position should be maintained until you give the cue “Free” or another cue. You will use the word “Stay,” however, anytime you need to move away from the dog. Place food in contact with your dog’s nose. Raise food over your dog’s head and back towards the forehead. Not too high or your dog will jump up. The dog will look up and fold into a sit position. Click and treat. All this is done silently at first in Phase I. Once the dog is performing 90% of the time in Phase I, move on to Phase II, and add the verbal command Sit. In Phase III you will add the hand signal below.

Down – is a foundational behavior that there will be plenty of times when your dog will need to lie down for extended periods of time. Down involves an implied Stay, as the position should be maintained until you give the cue “Free” or another cue. Teach the dog from a sitting position first and then from a standing position. Once in a Sit, use a lure to bring their face to the floor. Click and treat when the dog goes all the way down. If your dog’s rear end pops up say “Uh-oh!” and remove the treat. Start over by asking for a Sit and resume luring the dog down from a Sit position. Repeat as necessary. All this is done silently at first in Phase I. Then follow the same process from a standing position. Increase the criteria meaning once the dog has offered to lie down from either a sit or stand position five or eight times by following the treat, say the command and wait. It may take 30 to 60 seconds before the dog gets into the Down position. Don’t say anything or move. Let your dog figure this out. As long as the dog stays interested, allow them to think it through. As soon as the dog lies down, click and reward in position. Once the dog is performing 90% of the time in Phase I, move on to Phase II, and add the verbal command Down. In Phase III you will add the hand signal below. 
Loose Leash Walking – Teaching a dog to walk on a loose leash is one of the most important behaviors to work on. It’s also the most time-consuming and difficult behaviors to teach, as it requires consistency and patience from the handler. The goal is to teach the dog to walk by your side, either to the left or right, within 1 foot of your leg. Your dog has been trained to walk mainly on the left side. The dogs head should be beside your leg or slightly ahead. The dog should synchronize their movements with yours, changing direction, slowing down, speeding up and stopping anytime you do. This behavior must be so well trained that it becomes a habit for your dog. Here are a few rules to follow for better success:
- Make sure to treat in the “reward zone” – in other words, treat where the dog should be positioned. You can aim for the seam of your pants as a guide or even reward slightly behind you. It’s very important to avoid rewarding the dog in front of you or you’ll end up teaching your dog to cross in front of you, making it difficult for you to walk. Even if your dog is slightly ahead, still treat in the “reward zone.” The dog will adjust their position and learn to stay there to get the treat.
- Depending on your comfort level, you can hold the clicker in the hand that holds the leash or choose not to use a clicker at all and say the word “Yes!” instead. The clicker is not necessary in this exercise.
There are two main leash positions:
- Keep your treat pouch on the opposite side of your body frame from the dog and hold the leash in the hand closest to the dog. You’ll reward the dog with the hand opposite from where your dog is.
- Keep your treat pouch on the same side of your body as your dog. You’ll then hold your leash with the opposite hand and deliver the treats with the hand closer to the dog.
Don’t wrap the leash around your wrist or hold the leash by it’s handle. This could be dangerous if the dog takes-off for some reason. Instead fold the leash to the length that you need (just enough for the dog to be by your side, but not too long, so it doesn’t drag on the ground). Hold the leash in your hand and keep your arm comfortably alongside your body. The leash should be in the shape of the letter J.
- Learn to hold the leash firmly but not tightly. You’ll allow the leash to slide in your hand and stop it when needed by tightening your grip. We don’t need or want to jerk the dog. The leash is only a guide, not a punisher to the dog.
- Don’t hold the dog in position on a tight leash. That will never teach them to stay in position. That leash should remain loose. If the dog moves out of position and tightens the lease, you’ll immediately use one of the techniques described below.
- Treat the dog often at first for holding the position. With practice, you’ll be able to gradually decrease how often you reward.
- As the dog becomes more proficient, increase the criteria and click for eye contact while they are walking along by your side.
Techniques to Use if Out of Position
- Make a U-turn – Anytime the dog gets out of position and gets ahead of you, turn around and walk in the opposite direction. You may go back and forth on the same piece of sidewalk for a while before you can go anywhere else. The point is not to take a walk, but to teach the dog to focus on you. Here again, click and treat for position and eye contact. Test the dog’s focus by slowing down, speeding up, and changing directions. You’ll want to see the dog’s head slightly tilted toward you.
- Be a Tree – Click and treat every few steps while your dog walks in position. As soon as your dog moves forward (out of position), stop. Do not take any steps forward while the leash is tight or when the dog is not focused on your movements. Let the dog learn that a tight leash means that you’re not going anywhere. When the dog puts slack in the leash, pays attention to you and gets into position, start moving forward again. Click and treat after three to four steps and continue rewarding as long as the dog maintains the desired position.
Wait – Impulse control is critical for your service dog to earn so the “Wait” command is one of the very first cues I teach. “Wait” is less structured then Stay. “Wait” teaches dogs to control their impulse. It means “Wait for me to give you permission to proceed or give another cue.” I may ask a dog to “Wait” dozens of times a day! Ask them to “Wait” for anything pleasurable such as before: meals, treats, playing a game, being given a toy, going for a walk, jumping in or out of the car, or going outside and coming inside. Step 1- Set your dog up in normal, everyday situations where he would normally take it upon himself to bolt through the door or gobble up the turkey you dropped on the floor. Step 2-As soon as your dog goes to move forward, physically block him using your index finger as the hand signal below. Step 3-Back up just enough to give him an opportunity to try to go for it again. When he goes to make a move, physically block him again while using the hand signal. Step 4-Release the dog by stepping way back and giving an upbeat “ok!” Step 5-Repeat using the lesson training sequence and in daily real-life situations.

Come (Recall) – The come cue is also known as the recall. We need the dog to come when called no matter where we are, what they are doing and what else is going on. Even if you only do 10 repetitions a day, after a month you have 300 repetitions under your team’s collar. There is never too many repetitions of recall. Work daily on “recalls” using any opportunity you can possibly find to practice. Do everything from calling them from another room in the house to structured “Stay” and “Come”; first on-leash and gradually building on that. Start out in a place with no distractions; clip a 15 foot leash to your dog’s collar. Allow your dog to lose focus on you and wander off, sniff, explore etc. Say your dog’s name to get his attention. When he looks at you show him the treat. When your dog gets to you, give him lots of praise and the treat. If he doesn’t come toward you, briskly back up away from the dog because this will entice them to come towards you. Click and treat. Reward the highest value reward of all and release your dog to go explore again. Repeat this to a 90% reliability and then begin asking for a sit when they get to you before you reward them. Stay at this step until the dog automatically sits in front of you when called without you having to say Sit. At this point, stop showing the dog the treat to initiate the movement. You don’t want the dog to only come to you when you have a treat in hand. Add the cue “Come.” Next add people (2 to 4 others) who can call your dog to come to them in a low-distraction environment at around five to ten feet of distance.
RULES:
- Your dog MUST come every time you call them, no matter what!
- If they choose not to, you must enforce it.
- If it is an issue that they are not coming when called, you are giving them too much freedom and you must do structured recall practice before allowing them off-leash freedom.
- Also, I will never call them if I am not 100% sure they will come or I am not in a position to enforce it.
- If your dog is chasing a squirrel, calling them is only going to damage your training.
Under – Use under whenever you need the dog to go under a table, a bench, or your legs and stay out of the way. This behavior is especially useful when going to a restaurant or taking the dog to work, school, or a medical facility. The goal is to teach the dog that when he hears the cue “Under,” it means to go under the table, or between your legs and lie down. The dog should be as tucked under as possible. Utilize luring to lie down under the table. Warm up using the “Touch” cue – in other words, ask your dog to touch your hand three to five time to make sure they’re fluent with the behavior. You will need a reliable Touch to do this. Bring your hand under the table and then toward the floor. The dog should follow the hand and lie under the table. Click and treat. If the dog shows resistance, hold a treat between your fingers, show it to the dog and swiftly move it under the table, luring the dog in the position that you would like. Click and treat. Treat the dog two to three times for maintaining the position, then with a “Free” cue, encourage the dog to come out from under the table. Repeat this process until the dog easily lies under the table, barely following the hand anymore. As soon as possible, start fading your hand away until you don’t need to lure anymore. Adding the cue. Say the word “Under” as the dog starts moving toward the table.
Leave It – This cue is to be used for objects, people or animals that the dog should not have access to, like pills dropped on the floor, someone passing by or something icky on the ground. You don’t use this cue to interrupt a behavior your dog is likely to do again, such as licking themselves. When you say “Leave It” (in a neutral tone of voice), the dog turns away from whatever it is that they were interested in, and then looks at you. Your goal is for this behavior to be strong enough that you can walk the dog over food dropped on the floor without them trying to get to it. There is no need to use a commanding tone of voice – saying this cue nicely is just as effective. Getting started – food in your hand. Grab a handful of treats and present your open hand to you dog. If they try to get it, close your hand. Your dog should stare at your hand, but should look at you. Don’t move or say a word, simply allow the dog to figure out the game. Click and give a treat from your other hand when they look at you. Repeat this process until you can leave your hand open without them attempting to take the food from your hand. Next place a treat on the floor. If the dog tries to get it, cover it with your hand. As soon as your dog backs away, click and reward with a different treat in your other hand. Repeat until the dog no longer tries to get the treat on the floor. Wait for eye contact – delay your click and wait for the dog to look away from the treat and look at you. Click and treat. Repeat until the dog automatically makes eye contact after looking at the treat on the floor. Adding the cue-as soon as the dog looks up at your eyes, say the words “Leave It.” Click and treat.
Jump/Off – The cue “Jump” is used to get the dog to jump onto an elevated surface, like “Jump” into the car, “Jump” on the couch, etc. To perform the cue “Jump,” the dog will jump and then Sit or Down. We’ll then use “Off” to get the dog to get out of the car, off the couch or off any elevated surface. This includes “Off” the counter if they have their paws on the counter surface. When the dog hears the cue “Off,” they will move to the ground. For this behavior use a clicker, treats and an elevated surface like a platform. Getting started-with the dog on a leash, walk toward the platform. Click and treat for any movement toward the platform, like a look, sniff, touch of paw, etc. Repeat until the dog shows intentional behavior toward the platform. Click and treat for any small step toward getting on the platform. Encourage the dog by tapping on the platform with your hand. As soon as the dog places all four paws on the platform, click and treat the dog by placing a handful of treats in front of them on the platform. Walk away and encourage them to follow. Repeat this step until the dog automatically jumps on as you approach and gets off as you move away. Gradually reduce your movement toward or away from the platform until you can stand next to the platform. You can help the dog by throwing a treat on the floor to get them off the platform. Adding the Down-once the dog jumps up on the platform, say the word “Down,” click and treat the dog as soon as he is in position. After a few repetitions, delay saying the word “Down” and give the dog a chance to lie down on their own. Click and treat. The goal here will be to quickly stop having to cue the dog. Adding the cue-as the dog initiates movement onto the platform, say the work “Jump.” Click and treat once the dog is lying down on the platform. As the dog gets off the platform, say the word “Off.” Click and treat the dog for sitting in front of you.
Stand – With any dog, teaching “Stand” is useful behavior for grooming and veterinary exams. However a reliably trained “Stand” command is essential for service dogs because it makes it easier to dress them in their uniform for work. Step 1-Put a food reward in one hand and hold your dog’s leash in the other hand. With your treat hand, make a fist with the food tidbit closed inside and your thumb pointing up like the “thumbs up” signal. This becomes the hand signal for “Stand,” see below. Step 2-Face your dog, standing (or sitting) directly in front of them. Ask them to “Sit” or “Down” (train each separately) and “Stay” if you choose. Step 3-Allow your dog to smell the treat in your hand so s/he knows it is there but do not give the “thumbs up” signal until you are ready. Step 4-Once the dog is sitting (or down) and aware of the food reward, simultaneously give the “thumbs up” signal, back up a step or two and use the leash to encourage your dog to stand up. Step 5-As soon as your dog lifts his/her rear end off of the ground, be prepared to click and treat! Step 6-Repeat following the repetition sequence. Remember NOT to add a verbal cue until the command is reliable at 100%. *Note: You do not want your dog to take a step once s/he stands, so do not back up too many steps, just enough to give them room.

Stay – As mentioned for positional behaviors, like Sit, Down, or Stand, we teach the dog to hold the position until we ask for something else, like a Free or another behavior. But since the dog will be following you everywhere, they’ll become used to moving with you. If you need the dog to stay in position while you move away from them, it’s best to be clear and give the a different cue: “Stay.” This is meant to indicate to the dog, “You stay right there. I have to step away, but I’ll be right back.” While teaching this behavior, you’ll also want to go back to the dog, instead of calling the dog to you. The dog will be more likely to hold the position if they can relax into it. With this cue, you will be teaching the dog to maintain the position until asked to do otherwise. There are different criteria for this behavior: duration, distance and distraction. Each one of them will be taught separately before combining them together. In this training plan, you will use the behavior Down, but the same steps apply to other position such as Sit or Stand. Each position should be well known by the dog before teaching Down Stay, Sit Stay, or Stand Stay. Establishing the Down-This behavior should have been previously trained. To refresh it, ask the dog to Down. Click after a few seconds, treat in position, then ask for a Free. Click and treat again. Repeat until the dog consistently maintains the position for at least six seconds. Adding the cue-ask the dog to Down. Once in position, say the word “Stay,” wait several seconds and then treat in position. Get the dog out of position and then treat in position. Get the dog out of position with the “Free” cue, click and treat.
Place – Your dog’s “Place” can be a dog bed, a rug, a platform, or mat on the floor. Once your dog knows the command, you can take it with you anywhere if you like. For this cue, it helps if your dog knows “Down” as well as a level II or III “Down-Stay.” Step 1-Throw a treat on the dog’s spot. Step 2-As she takes notice of this new game, say her name to get her attention and toss the treat in an exaggerated manner to emphasize the motion of what will become the hand signal of pointing at her “Place” with your index finger, see below. Step 3-Click and treat even just her front feet touching the “Place” and shape gradually from there. Step 4-When she gets this step; begin to hold out on rewarding until she has all four paws on the “Place.” You have the option of going one of two directions at this point as we advance to Phase II. You can either finish training that she MUST lie down on her “Place,” or you can finish training that she can be in any position as long as she is on the “Place” with all four paws. Step 5-Repeat using the lesson training sequence and in daily real-life situations. Phase II – I’m going to outline insisting that the dog lie down because in my experience, dogs tend to be harder to keep on the “Place” in early training when they are allowed to stand up. Step 1-When your dog learns to follow your hand signal (meaning you are on an intermittent schedule of reinforcement and she understands that pointing to the “Place” means to go there and put all four paws on there she also knows she may or may not get a treat). Begin to cue or lure “Down” and “Stay.” Step 2-Click, treat, release, repeat using the lesson training sequence. Step 3-Gradually add distance, duration, and distractions.

Back – Dogs are not naturally aware of where their bootie and back end is and what it is doing. This is important for service dogs to know as they navigate obstacles and tight turns in busy public places. There are several exercises that you can do to help teach this. Step 1-Make a narrow corridor using some chairs in a line so your dog will not be able to turn around and lure them into place facing you. Step 2-Stand in front of your dog so you are facing each other with your dog standing backwards in the “hallway” that you made. Step 3-With a food reward cupped in your hands, present it so your dog can lick it but not eat it. Step 4-Take a step into your dog and aim for them to take just one step backwards. Mark and reward (click/treat). Step 5-Gradually shape two steps and then three steps until your dog can walk backwards through the hallway you created. Step 6-Repeat using the Lesson Training Sequence. Tip: Keep your dogs head straight to keep them from trying to back up at an angle.
Rear End Awareness II (Pivot on Box) – The idea is to teach your dog to plant their front feet on a box, bowl, or other item. When they move, they will pivot their back legs while their front paws remain in place on the box. Make sure the box does not slip on the floor. Aim for 1-2 inches tall, depending on the size of your dog. Step 1-Have your dog step up with his/her front paws only. Mark and reward. Step 2-Begin to give distance until your dog understands that their front paws are to remain on the box. Step 3-Once your dog will keep his/her front paws on the box, take a step around the box using a lure for your dog to follow while the front paws remain in place. Stay close to the box so your dog does not step off. Step 4-As you go around the box in a clockwise motion, your dog will follow the lure with the top part of their body. This results in the back end pivoting around the box. Mark and reward starting with one step from the hind end. Step 5-Gradually shape additional steps until your dog pivots around the entire box. Step 6-Start from step one and teach the other direction.


